
DSB Social Network - Transition and Tuning Guide
DSB Social Network - Transition and Tuning Guide
IntroductionAcquire and Navigate DeathStar Bench Source CodeUnderstanding Scope of Changes to the Source CodePorting Dependent Binaries: Replacing AMD64 Binaries with ARM64 binariesPorting Bitnami Containers: “mongodb-sharded”Porting Bitnami Containers: “redis-cluster”Porting Bitnami Containers: “mcrouter”Porting DeathStarBench Source CodeGenerating Docker Images from Social Network source codeSetting up Kubernetes Cluster on BareMetal ServersLaunch Social network module on BareMetal ServersRun Workload From Remote Client on ClusterAppendix
DSB Social Network - Transition and Tuning Guide
Setting up Kubernetes Cluster on BareMetal Servers
- Install pre-requisites on the primary bare-metal server that will serve as the control-plane node.
sudo apt update && sudo apt -y install build-essential python3-aiohttp openssl libssl -dev libz-dev libreadline-dev unzip lua5.1 luarocks
- Install Docker
#Update apt package index and install packages to allow apt to use a repo over HTTPS sudo apt update sudo apt -y install ca-certificates curl gnupg lsb-release #Add Docker’s official GPG key sudo mkdir -p /etc/apt/keyrings curl -fsSL https://download.docker.com/linux/ubuntu/gpg | \ sudo gpg --dearmor -o /etc/apt/keyrings/docker.gpg #Setup the repo echo "deb [arch=$(dpkg --print-architecture) signed-by=/etc/apt/keyrings/docker.gpg] \ https://download.docker.com/linux/ubuntu $(lsb_release -cs) stable" | \ sudo tee /etc/apt/sources.list.d/docker.list > /dev/null #Set umask to detect public key sudo chmod a+r /etc/apt/keyrings/docker.gpg #Update apt package index sudo apt update #Install docker engine sudo apt -y install docker-ce docker-ce-cli containerd.io docker-compose-plugin
- Install Kubernetes tools
sudo apt -y install curl apt-transport-https
curl -s https://packages.cloud.google.com/apt/doc/apt-key.gpg | sudo apt-key add -
echo "deb https://apt.kubernetes.io/ kubernetes-xenial main" | sudo tee /etc/apt/sources.list.d/kubernetes.list
sudo apt update
sudo apt -y install kubelet kubeadm kubectl- Install lua dependency
sudo luarocks install luasocket
- Install Helm
wget https://get.helm.sh/helm-v3.10.3-linux-arm64.tar.gz tar xf helm-v3.10.3-linux-arm64.tar.gz sudo mv linux-arm64/helm /usr/local/bin/
- Source the Lua paths
cat <<EOF | tee luapaths.lua file=io.open("path.txt","w") io.output(file) io.write(string.format("'"..package.path.."'")) io.close(file) cfile=io.open("cpath.txt","w") io.output(cfile) io.write(string.format("'"..package.cpath.."'")) io.close(cfile) EOF lua luapaths.lua export LUA_PATH=$(cat path.txt) export LUA_CPATH=$(cat cpath.txt) rm -rf path.txt cpath.txt luapaths.lua LUA_PATH=$(command lua -e "print(package.path..';${PWD}/DeathStarBench/socialNetwork/wrk2/deps/luajit/src/?.lua')")
- Enable plugin in config.toml
sudo sed -i 's/disabled_plugins/#disabled_plugins/g' /etc/containerd/config.toml
sudo systemctl restart containerd- Initialize Kubernetes cluster
sudo kubeadm init --pod-network-cidr=192.168.0.0/16 #****** Log of cluster initialization ******# ahalarnkar@instance-1:~$ sudo kubeadm init --pod-network-cidr=192.168.0.0/16 [init] Using Kubernetes version: v1.26.2 [preflight] Running pre-flight checks [preflight] Pulling images required for setting up a Kubernetes cluster [preflight] This might take a minute or two, depending on the speed of your internet connection [preflight] You can also perform this action in beforehand using 'kubeadm config images pull' [certs] Using certificateDir folder "/etc/kubernetes/pki" [certs] Generating "ca" certificate and key [certs] Generating "apiserver" certificate and key [certs] apiserver serving cert is signed for DNS names [instance-1 kubernetes kubernetes.default kubernetes.default.svc kubernetes.default.svc.cluster.local] and IPs [10.96.0.1 10.128.15.217] [certs] Generating "apiserver-kubelet-client" certificate and key [certs] Generating "front-proxy-ca" certificate and key [certs] Generating "front-proxy-client" certificate and key [certs] Generating "etcd/ca" certificate and key [certs] Generating "etcd/server" certificate and key [certs] etcd/server serving cert is signed for DNS names [instance-1 localhost] and IPs [10.128.15.217 127.0.0.1 ::1] [certs] Generating "etcd/peer" certificate and key [certs] etcd/peer serving cert is signed for DNS names [instance-1 localhost] and IPs [10.128.15.217 127.0.0.1 ::1] [certs] Generating "etcd/healthcheck-client" certificate and key [certs] Generating "apiserver-etcd-client" certificate and key [certs] Generating "sa" key and public key [kubeconfig] Using kubeconfig folder "/etc/kubernetes" [kubeconfig] Writing "admin.conf" kubeconfig file [kubeconfig] Writing "kubelet.conf" kubeconfig file [kubeconfig] Writing "controller-manager.conf" kubeconfig file [kubeconfig] Writing "scheduler.conf" kubeconfig file [kubelet-start] Writing kubelet environment file with flags to file "/var/lib/kubelet/kubeadm-flags.env" [kubelet-start] Writing kubelet configuration to file "/var/lib/kubelet/config.yaml" [kubelet-start] Starting the kubelet [control-plane] Using manifest folder "/etc/kubernetes/manifests" [control-plane] Creating static Pod manifest for "kube-apiserver" [control-plane] Creating static Pod manifest for "kube-controller-manager" [control-plane] Creating static Pod manifest for "kube-scheduler" [etcd] Creating static Pod manifest for local etcd in "/etc/kubernetes/manifests" [wait-control-plane] Waiting for the kubelet to boot up the control plane as static Pods from directory "/etc/kubernetes/manifests". This can take up to 4m0s [apiclient] All control plane components are healthy after 6.501394 seconds [upload-config] Storing the configuration used in ConfigMap "kubeadm-config" in the "kube-system" Namespace [kubelet] Creating a ConfigMap "kubelet-config" in namespace kube-system with the configuration for the kubelets in the cluster [upload-certs] Skipping phase. Please see --upload-certs [mark-control-plane] Marking the node instance-1 as control-plane by adding the labels: [node-role.kubernetes.io/control-plane node.kubernetes.io/exclude-from-external-load-balancers] [mark-control-plane] Marking the node instance-1 as control-plane by adding the taints [node-role.kubernetes.io/control-plane:NoSchedule] [bootstrap-token] Using token: m6gfoc.h4bc4gyiimcsnddv [bootstrap-token] Configuring bootstrap tokens, cluster-info ConfigMap, RBAC Roles [bootstrap-token] Configured RBAC rules to allow Node Bootstrap tokens to get nodes [bootstrap-token] Configured RBAC rules to allow Node Bootstrap tokens to post CSRs in order for nodes to get long term certificate credentials [bootstrap-token] Configured RBAC rules to allow the csrapprover controller automatically approve CSRs from a Node Bootstrap Token [bootstrap-token] Configured RBAC rules to allow certificate rotation for all node client certificates in the cluster [bootstrap-token] Creating the "cluster-info" ConfigMap in the "kube-public" namespace [kubelet-finalize] Updating "/etc/kubernetes/kubelet.conf" to point to a rotatable kubelet client certificate and key [addons] Applied essential addon: CoreDNS [addons] Applied essential addon: kube-proxy Your Kubernetes control-plane has initialized successfully! To start using your cluster, you need to run the following as a regular user: mkdir -p $HOME/.kube sudo cp -i /etc/kubernetes/admin.conf $HOME/.kube/config sudo chown $(id -u):$(id -g) $HOME/.kube/config Alternatively, if you are the root user, you can run: export KUBECONFIG=/etc/kubernetes/admin.conf You should now deploy a pod network to the cluster. Run "kubectl apply -f [podnetwork].yaml" with one of the options listed at: https://kubernetes.io/docs/concepts/cluster-administration/addons/ Then you can join any number of worker nodes by running the following on each as root: kubeadm join 10.128.15.217:6443 --token m6gfoc.h4bc4gyiimcsnddv \ --discovery-token-ca-cert-hash sha256:bbc294a90a58946a6f25ff7aa731749e79c1db5d819c6f93c9f068cd18b91dd5
# To start using your cluster, you will need to run the following as a regular user mkdir -p $HOME/.kube sudo cp -i /etc/kubernetes/admin.conf $HOME/.kube/config sudo chown $(id -u):$(id -g) $HOME/.kube/config
- Now, we need to add a worker node in order to create our 2 node cluster. So, please follow Step 1 and Step 3 on a new bare metal machine (for worker node) before proceeding further
- Earlier in Step 8, we were able to initialize a cluster on control-plane (1st Baremetal machine node). Now, we can allow the other bare metal server (worker node) to join the control-plane
NOTE: that the IP, Port and discovery token are unique and may be different from what is shown below for your machine. Please do not copy paste below command directly. Instead copy the join string from output of “kubeadm init” command from your control-plane node. Also, the same join command can be used to add more than 1 node to join the cluster. In this example, we are showing how to join only one node
#Login to second server and run below commands sudo kubeadm join 10.128.15.217:6443 --token m6gfoc.h4bc4gyiimcsnddv \ --discovery-token-ca-cert-hash sha256:bbc294a90a58946a6f25ff7aa731749e79c1db5d819c6f93c9f068cd18b91dd5 #******* Log of cluster joining process ********# $ sudo kubeadm join 10.128.15.217:6443 --token m6gfoc.h4bc4gyiimcsnddv \ --discovery-token-ca-cert-hash sha256:bbc294a90a58946a6f25ff7aa731749e79c1db5d819c6f93c9f068cd18b91dd5 [preflight] Running pre-flight checks [preflight] Reading configuration from the cluster... [preflight] FYI: You can look at this config file with 'kubectl -n kube-system get cm kubeadm-config -o yaml' [kubelet-start] Writing kubelet configuration to file "/var/lib/kubelet/config.yaml" [kubelet-start] Writing kubelet environment file with flags to file "/var/lib/kubelet/kubeadm-flags.env" [kubelet-start] Starting the kubelet [kubelet-start] Waiting for the kubelet to perform the TLS Bootstrap... This node has joined the cluster: * Certificate signing request was sent to apiserver and a response was received. * The Kubelet was informed of the new secure connection details. Run 'kubectl get nodes' on the control-plane to see this node join the cluster.
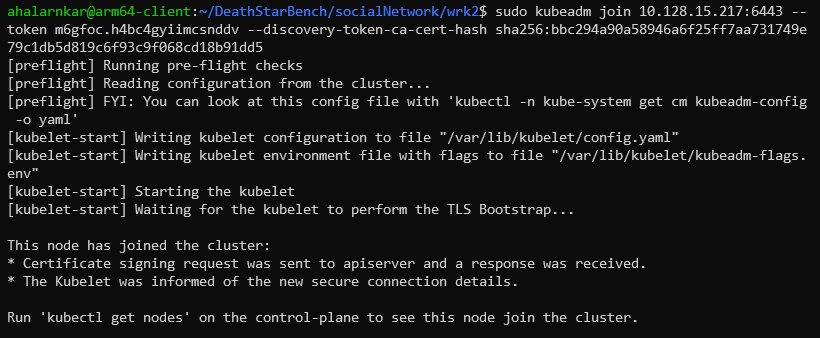 Status of worker node joining the cluster as seen on worker node
- Install Calico Operator: Download Here
kubectl create -f https://raw.githubusercontent.com/projectcalico/calico/v3.24.5/manifests/tigera-operator.yaml #******* Log for above command *******# $ kubectl create -f https://raw.githubusercontent.com/projectcalico/calico/v3.24.5/manifests/tigera-operator.yaml namespace/tigera-operator created customresourcedefinition.apiextensions.k8s.io/bgpconfigurations.crd.projectcalico.org created customresourcedefinition.apiextensions.k8s.io/bgppeers.crd.projectcalico.org created customresourcedefinition.apiextensions.k8s.io/blockaffinities.crd.projectcalico.org created customresourcedefinition.apiextensions.k8s.io/caliconodestatuses.crd.projectcalico.org created customresourcedefinition.apiextensions.k8s.io/clusterinformations.crd.projectcalico.org created customresourcedefinition.apiextensions.k8s.io/felixconfigurations.crd.projectcalico.org created customresourcedefinition.apiextensions.k8s.io/globalnetworkpolicies.crd.projectcalico.org created customresourcedefinition.apiextensions.k8s.io/globalnetworksets.crd.projectcalico.org created customresourcedefinition.apiextensions.k8s.io/hostendpoints.crd.projectcalico.org created customresourcedefinition.apiextensions.k8s.io/ipamblocks.crd.projectcalico.org created customresourcedefinition.apiextensions.k8s.io/ipamconfigs.crd.projectcalico.org created customresourcedefinition.apiextensions.k8s.io/ipamhandles.crd.projectcalico.org created customresourcedefinition.apiextensions.k8s.io/ippools.crd.projectcalico.org created customresourcedefinition.apiextensions.k8s.io/ipreservations.crd.projectcalico.org created customresourcedefinition.apiextensions.k8s.io/kubecontrollersconfigurations.crd.projectcalico.org created customresourcedefinition.apiextensions.k8s.io/networkpolicies.crd.projectcalico.org created customresourcedefinition.apiextensions.k8s.io/networksets.crd.projectcalico.org created customresourcedefinition.apiextensions.k8s.io/apiservers.operator.tigera.io created customresourcedefinition.apiextensions.k8s.io/imagesets.operator.tigera.io created customresourcedefinition.apiextensions.k8s.io/installations.operator.tigera.io created customresourcedefinition.apiextensions.k8s.io/tigerastatuses.operator.tigera.io created serviceaccount/tigera-operator created clusterrole.rbac.authorization.k8s.io/tigera-operator created clusterrolebinding.rbac.authorization.k8s.io/tigera-operator created deployment.apps/tigera-operator created # ***********************************************# kubectl create -f \ https://raw.githubusercontent.com/projectcalico/calico/v3.24.5/manifests/custom-resources.yaml #******* Log for above command *******# ahalarnkar@instance-1:~$ kubectl create -f \ https://raw.githubusercontent.com/projectcalico/calico/v3.24.5/manifests/custom-resources.yaml installation.operator.tigera.io/default created apiserver.operator.tigera.io/default created # ***********************************************#
- Taint the nodes in the cluster (The control-plane node is tainted with the taint “node-role.kubernetes.io/control-plane“. This is to ensure that the control-plane node does not contain application service pods as it already contains the Kubernetes administration and network services. But, you can undo the taint as shown in below command so that all the pods for the social network module will be distributed by Kubernetes on both worker and control-plane nodes)
kubectl taint nodes --all node-role.kubernetes.io/control-plane-
- With the above steps, we are now ready to launch social network application from DeathStarBench suite on the 2 node cluster in the next section.
Created At : May 24th 2023, 6:24:01 pm
Last Updated At : July 31st 2023, 5:00:37 pm
Ampere Computing LLC
4655 Great America Parkway Suite 601
Santa Clara, CA 95054


| | | | | |
© 2023 Ampere Computing LLC. All rights reserved. Ampere, Altra and the A and Ampere logos are registered trademarks or trademarks of Ampere Computing.
This site is running on Ampere Altra Processors.